
If you’re a Roblox fan looking to enhance your gameplay visuals with shaders, you’re in the right place.
In this article, I’ll walk you through the step-by-step process of installing shaders using Bloxshade, a tool I created that automatically installs Reshade shaders into your Roblox folder, applies presets, and even adds patches.
Follow this guide carefully to ensure you don’t miss any key steps.
What You’ll Need Before You Start
Before jumping into the installation process, make sure you have the following:
- Nvidia Graphics Card: This method requires an Nvidia graphics card.
- GeForce Experience: Make sure this software is installed and properly configured.
How to Check for an Nvidia Graphics Card
- Open Task Manager by pressing
Ctrl + Shift + Esc. - Navigate to the Performance tab.
- Look for Nvidia under the GPU section. If you see it, you’re good to go.
Setting Up GeForce Experience
- Open GeForce Experience.
- Click on Settings (gear icon).
- Ensure that the In-Game Overlay is turned on. This step is crucial as the overlay is necessary for the shaders to work.
If everything looks good so far, you’re ready to move on to the installation process.
Step 1: Download the Bloxshade Installer
This link may point to a GitHub page or another website, depending on updates: https://bloxshade.com/
Note: The source code for Bloxshade is open-source, so feel free to audit the code if you wish.
Download the installer file to your computer.
Step 2: Extract and Run the Installer
- Once the download is complete, navigate to the downloaded ZIP file.
- Important: Extract the contents of the ZIP file before running the installer. If you attempt to run the installer from within the ZIP, it won’t work properly.
- You can extract it to your Desktop or Downloads folder, or any other location you prefer.
- After extracting the files, double-click the executable (
.exe) to start the installation.
Step 3: Installing Bloxshade
When you run the installer, you will receive a User Account Control (UAC) prompt. Click Yes to allow the program to make changes to your system.
The Bloxshade installer will now open.

If Roblox updates in the future, you don’t need to reinstall Bloxshade completely. You can simply recreate the shortcuts if needed.
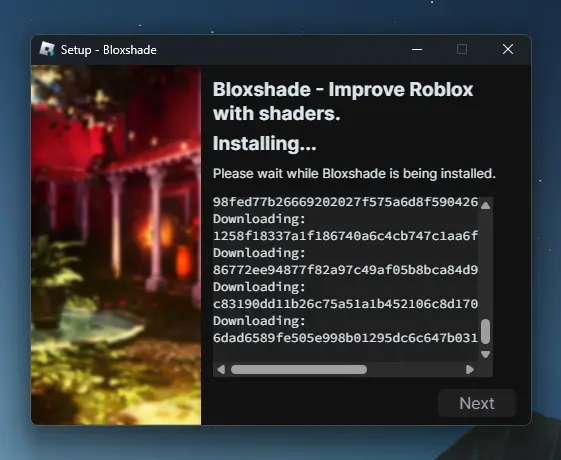
Click on Install and let the installer run. This process may take a few minutes, so be patient.
Once the installation is complete, click Finish to close the installer.
Step 4: Configuring Roblox Graphics Settings
Now that Bloxshade is installed, it’s time to set up Roblox to work with the shaders.
Open Roblox and start a game of your choice.
Once you’re in the game, click on the Roblox icon (top-left corner of the screen) to open the settings menu.
Under Settings, change your Graphics Mode from Automatic to Manual.
Set the Graphics Quality to 8 or 10. This ensures the shaders will apply correctly. If your graphics setting is too low, the shaders won’t work.
Step 5: Applying Shaders Using GeForce Experience
Now it’s time to apply the shaders using the GeForce Experience overlay.
Press Alt + F3 on your keyboard. This will open the GeForce Experience Overlay.
If you see a message saying “A supported game is required to use this feature,” press Alt + F3 again to bypass this.
You’ll now see slots labeled 1, 2, and 3, where you can apply shader presets.
Adding Shader Presets
- For this guide, I recommend using the Bloxshade Blooming HDR Ultra preset, which is great for enhancing visuals, especially in showcase games.
- Select the preset and wait a few moments for it to apply.
If you prefer a different shader, you can switch it by selecting a different preset for that slot.
Step 6: Adjusting or Removing Shaders
If you want to remove a shader, select the corresponding slot and click Delete.
Sometimes, you may need to click off the Roblox window before closing the game to avoid the GeForce Experience overlay from getting stuck.
Troubleshooting & Future Updates
If you encounter any issues with the overlay getting stuck, I’m working on adding a fix for this directly in the installer. In the meantime, feel free to join the Discord server (link in the video description) where I can help troubleshoot any problems.
Final Thoughts: Before and After
Now that you’ve successfully installed and configured Bloxshade, take a moment to appreciate the difference!
Here’s a quick comparison:
- Before Shaders: Standard Roblox visuals, flat lighting.
- After Shaders: Enhanced graphics with improved lighting, bloom effects, and more depth.
You’ve now installed shaders on Roblox Bloxstrap using Bloxshade. Enjoy the enhanced visuals and feel free to experiment with different presets to find the look that best suits your gameplay.