In this article, I’ll walk you through the process of accessing the new Roblox in-game menu using Bloxstrap. Roblox has been using the same default menu for nearly nine years now, and frankly, it’s time for a change. I’ll guide you step by step on how to get the new menu and even show you some additional tweaks for better performance.
Default Roblox Menu: A Look Back
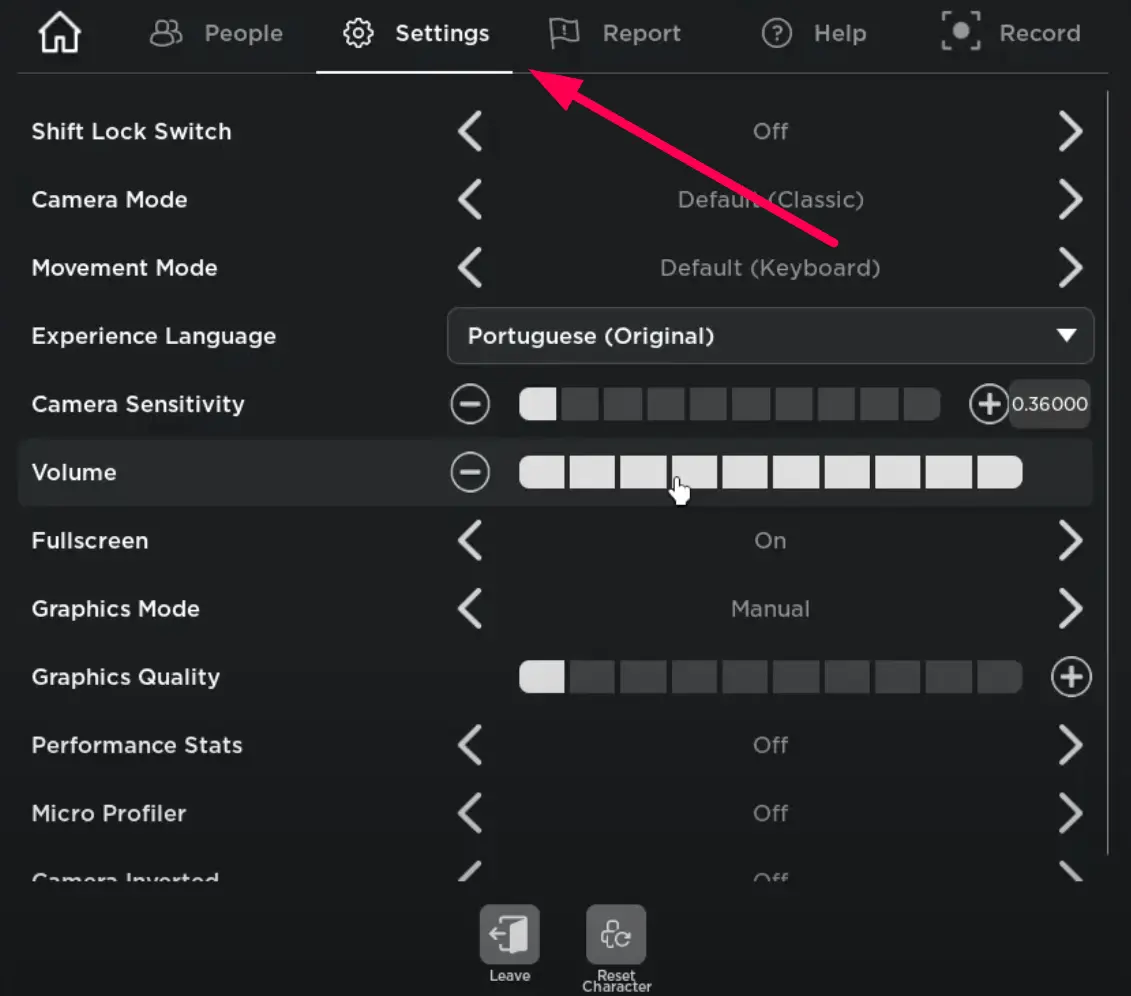
Before diving into the steps, let’s take a look at the default Roblox menu. If you’ve been playing Roblox for a while, you’re likely familiar with it.
It’s a basic interface that hasn’t changed much in almost a decade.
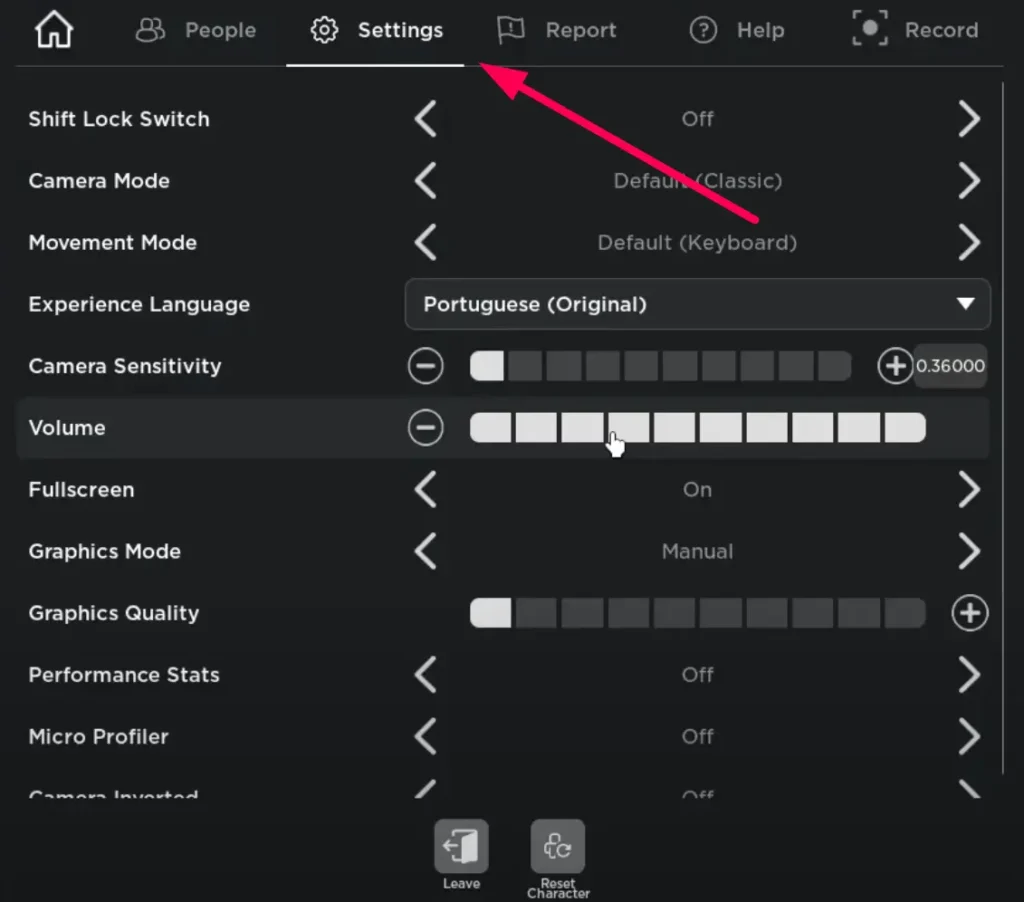
- Duration of Use: Roblox has been using this menu for around nine years.
- Appearance: For most users, it takes up the full screen, but for me, it shows up in a smaller window. Either way, it’s simple and, to be honest, a little boring.
Now that we’ve reminisced about the old menu, let’s move on to getting the new menu.
How to Access the Bloxstrap Menu: A Step-by-Step Guide
Step 1: Download and Install Bloxstrap
To get the new Roblox menu, you’ll first need to download Bloxstrap. Follow these steps carefully:
- Go to the Link: Visit to the Bloxstrap download page.
- Download Bloxstrap: Click on the Bloxstrap.exe file to start downloading the installer.
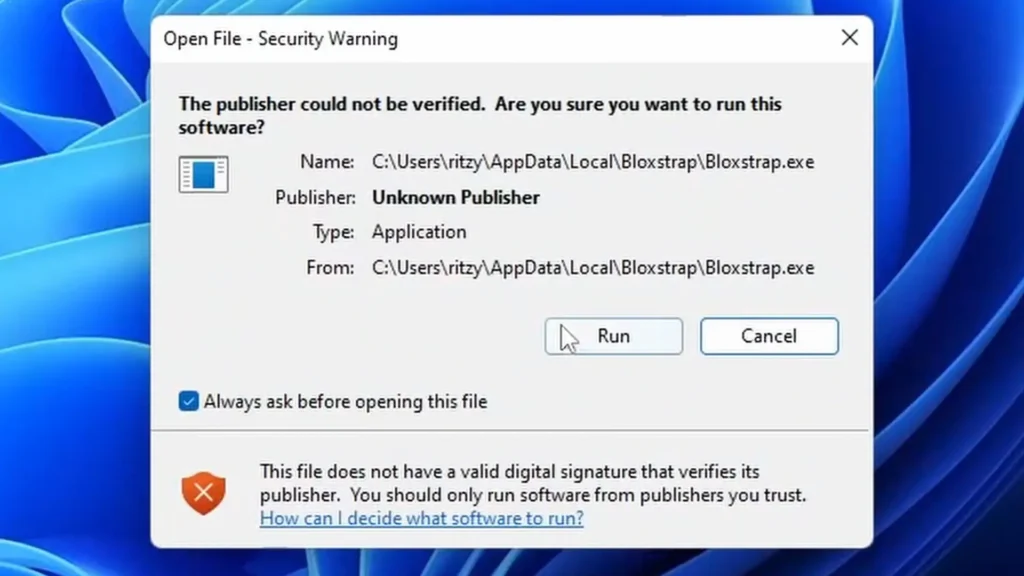
- Open the Installer: Once the download is complete, open the file.
- Install Required Components: If an error pops up stating that something is not installed, just click Yes. This will guide you to a page where you can download and install the missing components automatically. After the installation, you should be able to open the Bloxstrap application without any issues.

Step 2: Customize Your Settings for Performance and Features
Performance Enhancements
Bloxstrap isn’t just about changing the menu – it can also boost performance. Here’s how you can optimize it:
- Allow Activity Joining: You can turn this on to improve your Roblox experience.
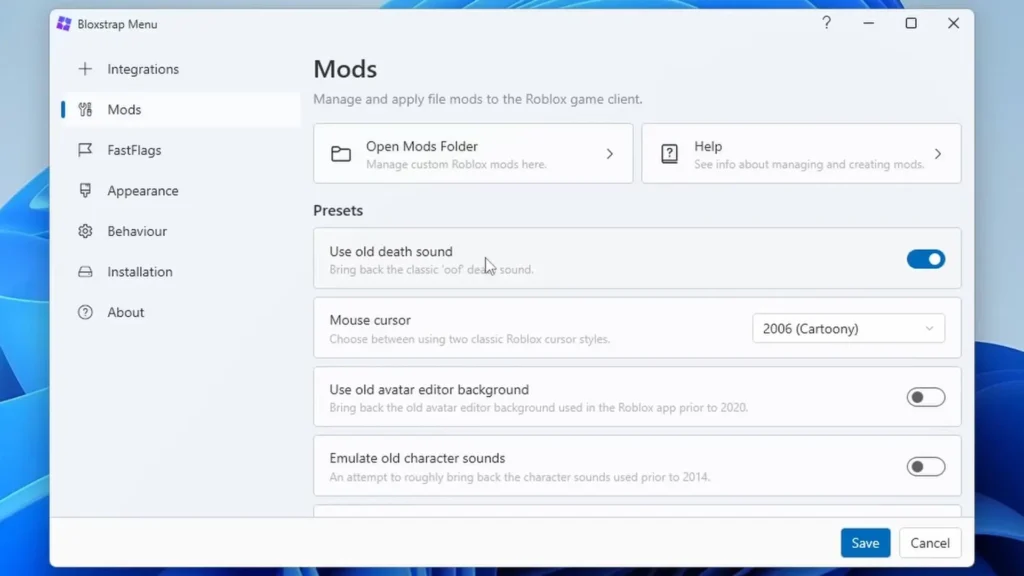
- Mods and Old Features: Bloxstrap lets you enable mods such as:
- The old mouse cursor.
- Disable Desktop App: You have the option to disable the desktop app, but I’ll keep it on for now.
Fast Flags
Now, let’s get into the details of Fast Flags, a feature that significantly improves the game’s performance.
- Frame Limit: Set the frame limit according to your preference.
- Alt + Enter Shortcut: Enable this option to make your game run smoother when pressing Alt + Enter.
- Render Distance: You can also adjust the graphics and render distance for better visuals.
Step 3: Selecting the New In-Game Menu
Now for the exciting part – choosing the version of the in-game menu you want to use. Bloxstrap offers several options:
- Current Menu: This is the default menu, also known as Version 1.
- Version 1 (2015): A bit dated but still functional.
- Version 2 (2021): The latest version of the Roblox in-game menu.
- Version 3: This version is still being tested but offers some exciting new features.
Let’s explore these options:
Version 2 (2021) – My Recommendation
I personally recommend Version 2, released in 2021, because it’s the smoothest and most modern-looking.
Features: You can use the mobile interface on a desktop, which is a fun twist. It also gives you a lot of control over how Bloxstrap behaves when starting up, including:
Dark Mode: A visually appealing option that’s easier on the eyes.
Custom Startup Logo: Change the startup screen to a logo of your choice.
Trying the Mobile Interface
If you’re curious, you can try the mobile interface on your desktop. All it does is move the icons down to the bottom of the screen.
Dark Mode and Startup Options
I highly recommend enabling Dark Mode as it makes the interface look cleaner. You can also choose the style and logo for your startup screen, and even select older versions like the 2017 or 2018 Roblox logos.
Step 4: Installing the New Menu
Once you’ve chosen your preferred settings, it’s time to install the new menu.
- Click Install: After customizing all your settings, simply click Install.
- Reinstall Roblox: Bloxstrap will automatically reinstall Roblox for you, but don’t worry, this is completely normal.
- Old Roblox Logo: As a fun touch, you’ll see the old Roblox logo (from 2017 or 2018) during the installation process.
This part may take a while, depending on the options you’ve selected, especially if you chose Canary, which is a testing version of Roblox.
Step 5: Fixing Potential Glitches
Sometimes, glitches occur during the installation or startup process. If your new menu doesn’t load correctly, here’s what you can do:
Reopen Bloxstrap: Try reopening Bloxstrap to see if the issue resolves itself.
Check for Glitches: Occasionally, some glitches can cause errors like missing menus. Reinstalling Bloxstrap or adjusting your settings should fix this.
Menu Shortcut: You can create a shortcut on your desktop by navigating to the file location of Roblox, right-clicking the file, and selecting Send to Desktop. This will give you quick access to the menu.
Testing Version 3 of the Menu
I also tried out Version 3, which, while still in development, offers some cool new features.
However, it’s not as smooth as Version 2, and I encountered a few glitches during my tests.
Features in Version 3:
- New Tabs: This version organizes actions and settings into separate tabs for easier navigation.
- Additional Features: It includes extra controls for reporting players and adjusting your experience language settings.
Unfortunately, this version didn’t fully load for me, but that’s probably due to some of the early development issues.
Conclusion: Which Menu Version is Best?
After testing out all the available versions, I’d say Version 2 is the best option. It’s smooth, modern, and just feels better overall.
Here’s why I prefer it:
- Smooth Animations: The transitions are slick and make navigating through the menu feel seamless.
- Ease of Use: It’s user-friendly, and you can easily adjust your game quality settings.
- Dark Mode: The dark theme makes it much easier on the eyes, especially during long gaming sessions.