Are you tired of the standard Roblox cursor? What if I told you that you could change it to something entirely your own?
In this guide, I’ll walk you through the process of customizing your Roblox cursor using Bloxstrap. By the end of this, you’ll know how to turn your cursor into a simple dot. When you click on something, your custom cursor will work just like the original one.
Important Notes
Before we begin, keep in mind that this method may not work in games with custom cursors. Some games, like Steep Steps, have built-in custom cursors that will override whatever you set up. However, the majority of Roblox games use the default cursor, which makes this method perfect for most situations.
Step-by-Step Guide to Adding a Custom Cursor:
Step 1: Download and Open Bloxstrap
You need to download Bloxstrap. Once it’s installed, open the application. If you can’t find it immediately, just type “Bloxstrap menu” in your search bar, and it should pop up.
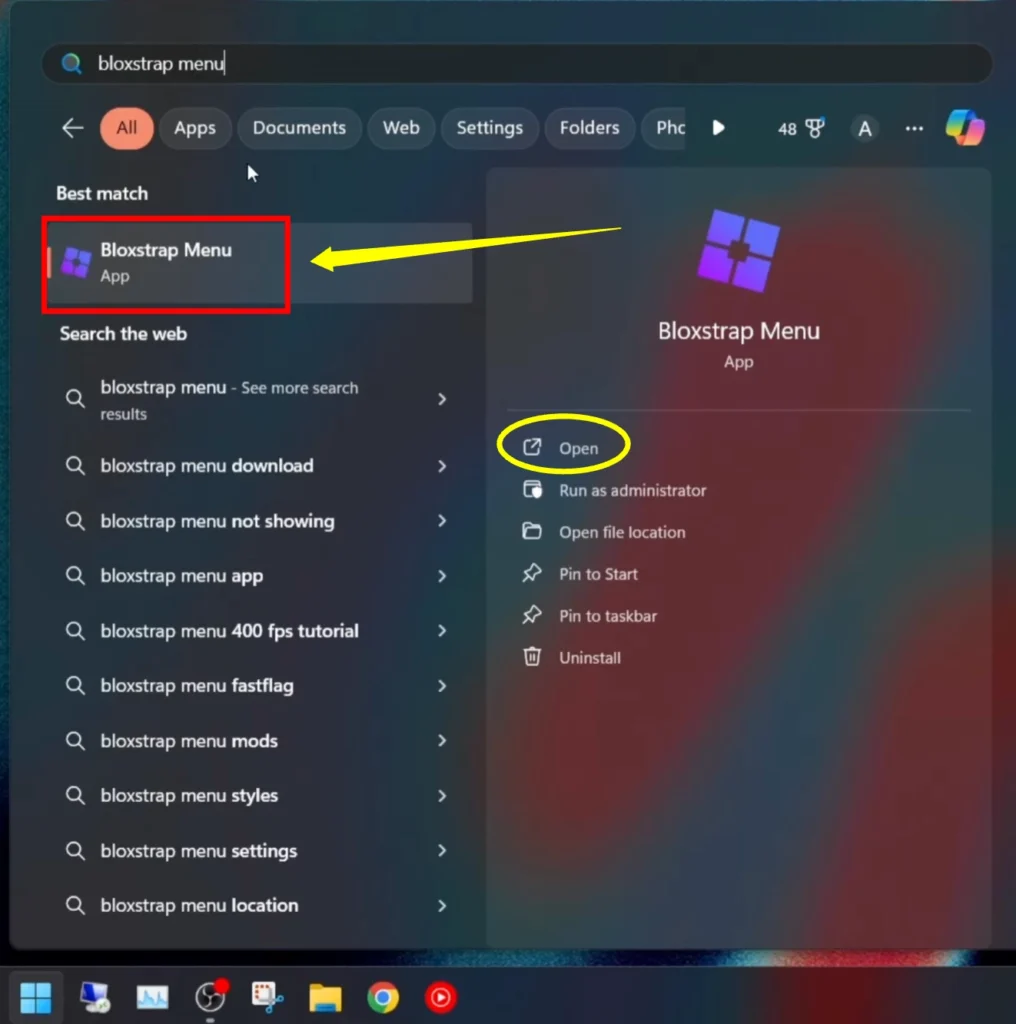
- Open Bloxstrap.
- Search for the Bloxstrap menu.
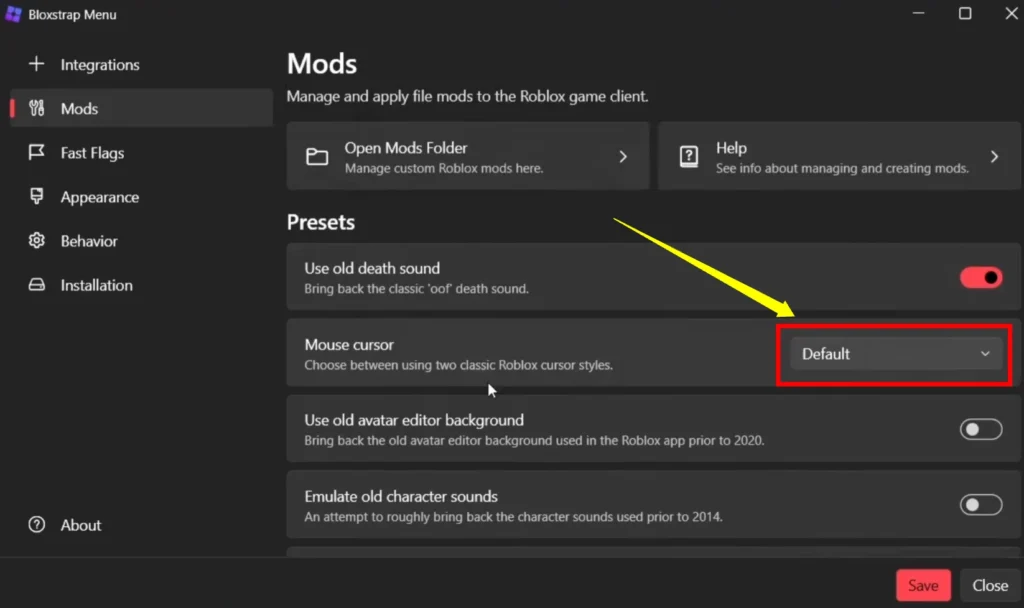
Step 2: Navigating to the Mods Section
Bloxstrap allows you to customize various aspects of Roblox, including the mouse cursor.
Once you’ve opened the Bloxstrap menu, you’ll want to head to the Mods section.
- In the Bloxstrap menu, navigate to Mods.
- Ensure that Mouse Cursor is set to default. This setting will allow you to apply your custom texture to the cursor.
Best Rendering Mode for Bloxstrap
Step 3: Accessing the Mods Folder
Now that you’re in the Mods section, you need to open the Mods folder. This is where you’ll be placing your custom mouse textures.
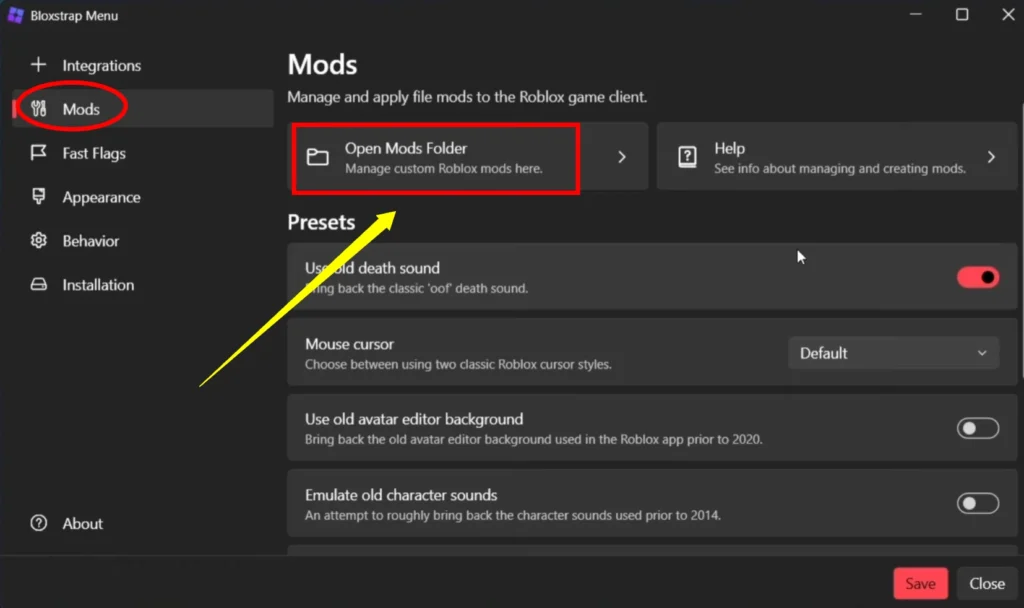
- Click on Open Mods Folder.
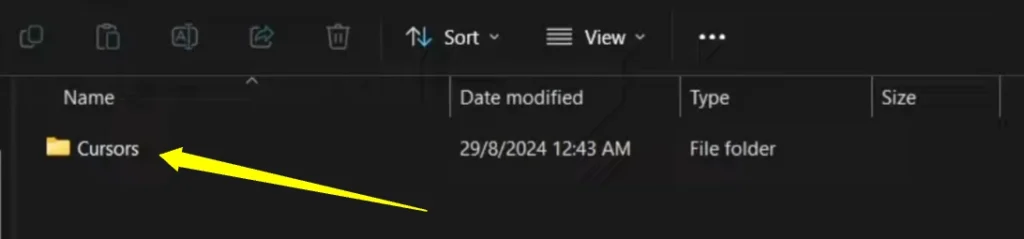
- Once inside, go to Content and then Textures.
- Inside the Textures folder, you’ll find the Cursors folder, which contains the default Roblox cursors.
Step 4: Understanding Cursor Files
Inside the Cursors folder, you’ll see several files. One notable file is the Mouse Lock Cursor. However, Roblox has changed how Shift Lock works, so this cursor may not function in all games. You’ll also notice the main mouse cursor file here.
Key Cursor Files:
- Mouse Lock Cursor: Works in some games but not all.
- Main Mouse Cursor: This is the standard cursor that we’ll be customizing.
Step 5: Customizing Your Cursor
Roblox cursors are 64×64 pixel images. For this tutorial, I’m going to show you how to modify the default cursor using a simple tool like paint.net.
- Open the Main Mouse Cursor file in paint.net (or any image editor).
- You’ll notice that the image is 64×64 pixels, with the click point in the center of the image. This is important because wherever your image’s center is will be where clicks register in Roblox.
Custom Cursor Example:
For example, I use a custom dot cursor that I created myself. You can make something similar or entirely different.
- Choose an image (make sure it’s transparent, like a PNG file).
- Resize the image to 64×64 pixels.
- Ensure that the image is centered so that the click point remains accurate.
You can create just about anything for your cursor—a green dot, a logo, or even an arrow. Just be sure to maintain the correct dimensions.
Step 6: Saving and Applying the Cursor
Once you’ve created your custom cursor, it’s time to save and apply it.
- Save your custom cursor image in the Cursors folder where the original was located.
- The cursor should be named exactly as it was before, using proper capitalization and no spaces. For instance:
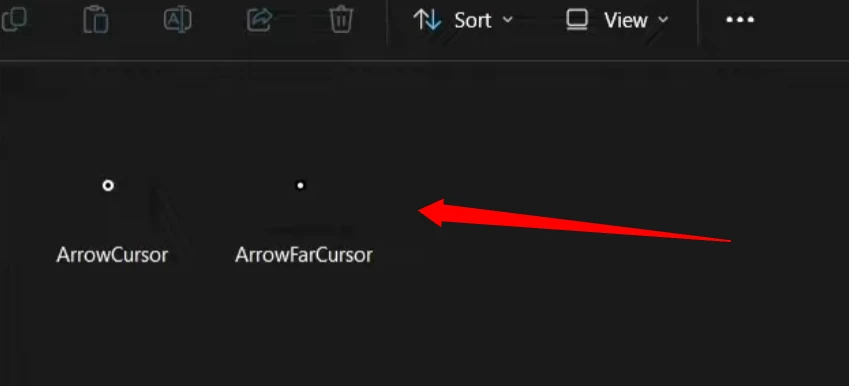
- ArrowFarCursor: The cursor that appears when you’re hovering over buttons.
- ArrowCursor: Your normal cursor when you’re not hovering over anything.
Make sure the filenames match precisely to avoid any issues.
Step 7: Testing Your New Cursor in Roblox
After saving your custom cursor, you’re ready to test it out in-game. Go ahead and launch Roblox via Bloxstrap, and your new cursor should be visible immediately.
- Search for Bloxstrap and launch Roblox from there.
- You’ll notice that your custom ArrowCursor and ArrowFarCursor are now applied.
- The ArrowCursor is your normal cursor.
- The ArrowFarCursor appears when you hover over buttons, indicating that you can click them.
Additional Tips and Tricks
Customizing your cursor can be especially helpful in certain Roblox games like PvP games, where having a unique or highly visible cursor could give you an edge.
Keep It Simple: Remember, the cursor is small, so overly detailed images might not translate well.
Experiment: Feel free to go wild with different designs. You can always switch back to the default cursor by deleting your custom files.
Conclusion
You’ve now learned how to create your own custom cursor for Roblox using Bloxstrap. If it’s a simple dot, a fun button, or something entirely unique, the choice is yours. So, go ahead get creative and make your Roblox experience truly your own.